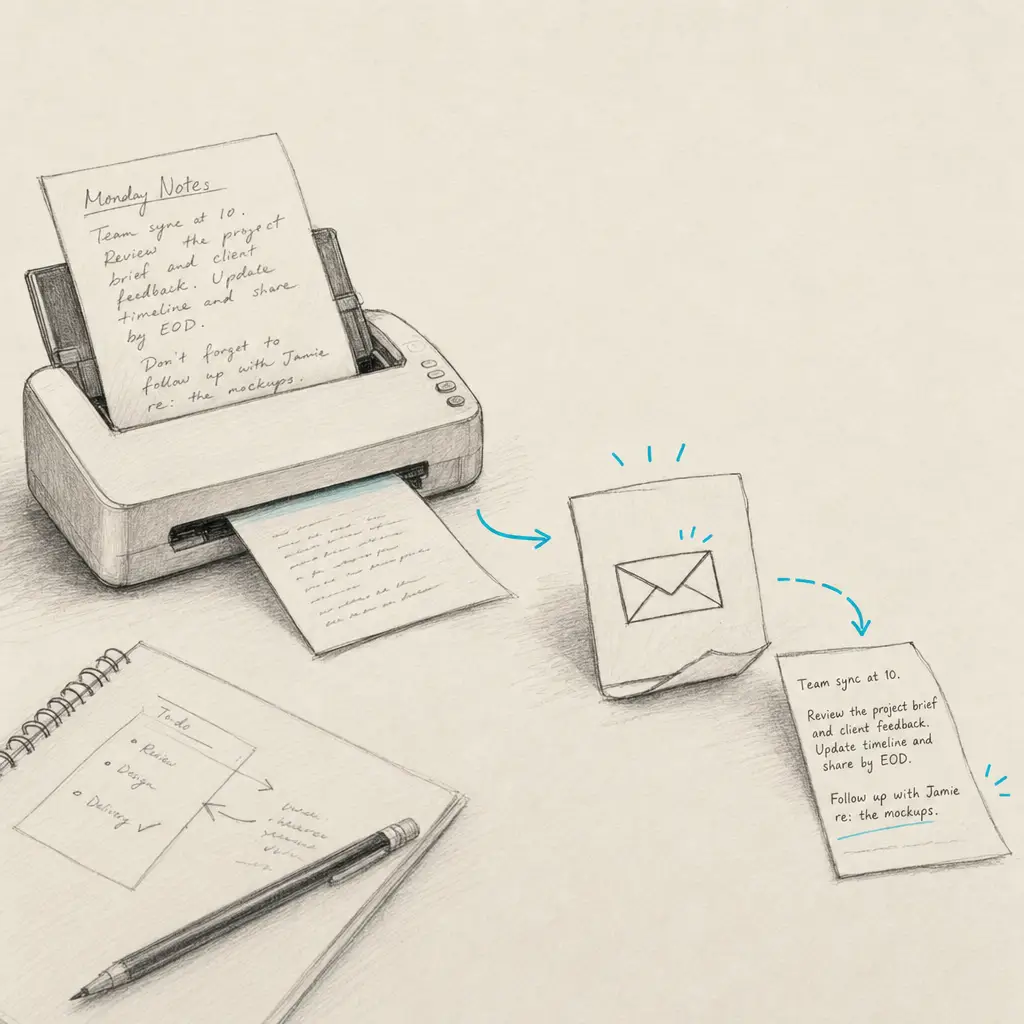
Scan Handwriting to Text: Complete Guide for Any Device | Handwriting OCR

Scan Handwriting to Text: Complete Guide for Any Device

Last updated

Scan Handwriting to Text: Complete Guide for Any Device

Converting handwritten notes, letters, and documents to digital text starts with scanning—capturing a clear digital image that OCR software can process. Whether you're using your iPhone camera, an Android phone, a tablet, or a dedicated document scanner, the scanning method and settings significantly impact OCR accuracy. This comprehensive guide covers every approach to scanning handwriting for text conversion, from free built-in phone features to professional scanning workflows that maximize recognition quality.

Quick Takeaways

  • Phone cameras (iPhone and Android) provide the easiest scanning method for handwritten notes, with no special equipment required
  • Dedicated document scanners deliver higher quality scans (300+ DPI) that improve OCR accuracy on challenging handwriting
  • Lighting, positioning, and resolution settings dramatically affect whether OCR can accurately recognize your handwriting
  • Built-in tools like Apple Live Text and Google Lens handle simple scanning, while specialist OCR platforms process difficult cursive and historical scripts

Understanding Handwriting Scanning vs OCR

Scanning and OCR are related but distinct processes that work together to convert handwriting to text.

The Two-Step Process

Step 1: Scanning captures a digital image of your handwritten document. This produces a photo file (JPG, PNG) or PDF containing pixels representing your handwriting—but those pixels aren't yet selectable, searchable, or editable text.

Step 2: OCR (Optical Character Recognition) analyzes the scanned image using AI to recognize individual letters, words, and sentences, converting visual representations of text into actual digital characters you can copy, edit, and search.

Quality scanning directly determines OCR success. Blurry scans, poor lighting, or low resolution make even the best OCR systems struggle. Conversely, crisp, well-lit, high-resolution scans enable accurate text recognition even for challenging cursive handwriting.

Why Scanning Method Matters for Handwriting

Printed text OCR is relatively forgiving—even mediocre scans usually work acceptably. Handwriting recognition requires higher quality inputs because:

  • Letterform variation: Every person's handwriting differs, so OCR needs clear images to distinguish similar-looking letters
  • Cursive connections: Joined letters in cursive require precise scanning to capture where one letter ends and another begins
  • Ink consistency: Faded ink, pencil marks, or heavy pen pressure create contrast challenges that low-quality scans exacerbate
  • Historical documents: Old paper discoloration, aging ink, and paper texture demand high-resolution scanning

Scanning Handwriting with Your Phone

Modern smartphones provide surprisingly capable handwriting scanning, combining high-resolution cameras with computational photography that enhances image quality.

iPhone Handwriting Scanning

Built-in Live Text Feature (iOS 15+): Point your iPhone camera at handwritten text and tap the Live Text icon. iOS extracts text instantly, letting you copy it directly. Works remarkably well for clear, neat handwriting in good lighting.

Limitations: Live Text handles simple handwriting adequately but struggles with cursive, faded writing, or complex layouts. No batch processing—you scan one note at a time manually.

Notes App Scanning: Open Notes, tap camera icon, choose "Scan Documents." This captures high-quality PDF scans of handwritten pages, preserving layout and detail. Combine with Live Text for text extraction, or export to specialist OCR platforms for better accuracy on difficult handwriting.

Third-Party Scanner Apps: Apps like Microsoft Lens, Adobe Scan, and Scanner Pro offer edge detection, perspective correction, and lighting adjustment that improve scan quality. These apps produce cleaner images than Photos app shots, benefiting subsequent OCR processing.

For complete iPhone-specific scanning instructions, see our guide on how to scan handwritten notes on iPhone.

Android Handwriting Scanning

Google Lens: The easiest Android approach. Open Google Lens (built into Google Photos or standalone app), point at handwriting, tap text recognition. Google Lens performs instant OCR and lets you copy, translate, or search the extracted text.

Limitations: Like Live Text, Google Lens excels at clear handwriting but accuracy drops with cursive, faded ink, or complex documents. Best for quick note capture, not archival document digitization.

Google Drive Scanner: In Google Drive mobile app, tap + icon, choose "Scan." This creates high-quality PDF scans with automatic edge detection and lighting correction. Excellent for creating clean scans you later process with more sophisticated OCR.

Third-Party Scanner Apps: Microsoft Office Lens (now Microsoft Lens), CamScanner, and Tiny Scanner work identically on Android as iPhone, providing edge detection and enhancement features.

Detailed Android scanning workflows are covered in Android handwriting scanner guide.

Phone Scanning Best Practices

Regardless of iPhone or Android, these practices improve scan quality:

Lighting: Position your document under even, bright light without harsh shadows. Natural indirect daylight (near a window but not in direct sun) works beautifully. Avoid overhead lights that create shadows from your hand or phone.

Positioning: Hold your phone parallel to the document (not at an angle). Most scanner apps provide on-screen alignment guides. Fill the frame with the document—don't include unnecessary surrounding area.

Stability: Use both hands or rest your phone on a surface to eliminate motion blur. Even slight camera shake degrades image sharpness enough to reduce OCR accuracy.

Resolution: Use your phone's highest camera resolution setting. More megapixels capture finer details in handwriting that help OCR distinguish similar letters.

Contrast: If handwriting is faded, scanner app contrast/brightness adjustments can help. However, extreme adjustments may introduce artifacts—test OCR results to find the sweet spot.

Scanning with Tablets (iPad, Android Tablets)

Tablets combine phone-like scanning convenience with larger screens that make document positioning easier and more accurate.

iPad Scanning Advantages

Larger Viewfinder: iPad's bigger screen makes it easier to see exactly what you're capturing and verify text is in focus before scanning.

Apple Pencil Integration: For documents you need to annotate before scanning, iPad with Apple Pencil lets you mark up handwritten notes, then scan the annotated version.

Files App Scanning: Like iPhone, iPadOS includes built-in document scanning in Files app and Notes app with Live Text support for immediate text extraction.

Workflow Integration: iPad productivity apps (GoodNotes, Notability, PDF Expert) include scanning features that fit into note-taking and document management workflows.

Android Tablet Scanning

Android tablets provide the same Google Lens and Drive scanner functionality as Android phones, with larger screens making document alignment more precise.

Productivity Apps: Samsung Notes (on Samsung tablets), Evernote, and OneNote offer integrated scanning features that fit into broader note organization systems.

Dedicated Document Scanners

For serious handwriting digitization projects—family letter collections, research notebooks, historical document archives—dedicated scanners deliver superior quality that maximizes OCR accuracy.

Flatbed Scanners

How They Work: Place your document on glass, close the lid, and the scanner captures a high-resolution image (typically 300-600 DPI or higher). This eliminates camera shake, ensures perfect alignment, and captures every detail.

Advantages for Handwriting:

  • Consistent quality: Every scan has identical lighting and resolution
  • High DPI: 600 DPI scans capture subtle pen strokes and faded ink invisible to phone cameras
  • Large format support: Some flatbed scanners handle oversized documents larger than phone cameras can capture in one shot
  • Batch processing: Scan stacks of letters or notebook pages systematically

When to Use Flatbed: Delicate historical documents, faded ink, very small handwriting, or projects digitizing hundreds of pages where consistency and quality matter more than convenience.

Portable Document Scanners

Sheet-Fed Scanners: Feed individual pages through the scanner (like a printer in reverse). Fast for multi-page documents but can't handle bound books or fragile historical papers.

Overhead Scanners: Position the scanner above your document, scan without touching the paper. Excellent for bound journals, books, or delicate documents you can't run through sheet feeders.

When to Use: Mobile digitization projects, field research, or when you need portability but want better quality than phone cameras.

Scanner Resolution Guidelines

Handwriting Type Recommended DPI Why
Clear, large handwriting 300 DPI Standard sufficient for neat writing
Small or mixed handwriting 400-600 DPI Captures subtle details
Cursive or faded ink 600 DPI Maximum detail for OCR analysis
Historical documents 600+ DPI Preserves degraded ink and paper texture

Higher DPI produces larger files but provides more data for OCR algorithms to work with. For challenging handwriting, the extra file size is worthwhile.

Scanning Apps and Software Comparison

Choosing the right scanning application impacts both scan quality and workflow efficiency.

Best Mobile Scanner Apps

App Platform Strengths Best For
Apple Live Text iOS/iPadOS Built-in, instant, free Quick casual scanning
Google Lens Android/iOS Fast, integrates with Google services Quick note capture
Microsoft Lens Android/iOS Excellent edge detection, free Clean document scanning
Adobe Scan Android/iOS Professional features, PDF export High-quality PDFs
Scanner Pro iOS Powerful editing, workflow automation Power users
CamScanner Android/iOS Batch scanning, cloud integration Multi-page documents

Desktop Scanning Software

If you're using a dedicated scanner, software controls quality settings:

Built-in Scanner Software: Most flatbed scanners include basic software. Use it if you just need simple scans.

VueScan: Professional scanning software supporting 6000+ scanner models with advanced controls over color, resolution, and format. Excellent for getting the most from older scanners.

Adobe Acrobat: If you already have Acrobat, its scanning interface offers good control and creates searchable PDFs directly (includes basic OCR, though handwriting recognition is limited).

Preparing Documents for Scanning

Physical document preparation before scanning significantly impacts OCR results.

Document Handling

Flatten Pages: Use a book weight or glass to flatten curled pages, eliminating shadows and focus problems from page curves.

Remove Bindings When Safe: For letters or documents held with paperclips or staples, remove them to scan flat. Don't damage bound books—use overhead scanners or careful flatbed positioning instead.

Clean Documents: Gently remove dust or debris that could appear as marks in scans. For historical documents, use archival cleaning methods—don't damage the material.

Optimal Lighting for Scanning

Flatbed Scanner Lighting: Built-in, so you just ensure the document sits flat and the scanner lid closes properly.

Phone/Camera Scanning:

  • Indirect natural light: Near a window without direct sun (creates harsh shadows)
  • Overhead LED panels: Even, diffused artificial light works well if natural light isn't available
  • Avoid flash: Phone flash creates glare and harsh shadows—turn it off and use ambient lighting

Background Considerations

Contrast: Scan handwritten documents on a contrasting background. White paper with dark ink scans best against a white scanner bed or white surface. Dark paper with light ink benefits from darker backgrounds.

Flatbed Glass Cleanliness: Smudges and dust on scanner glass appear in every scan. Clean glass regularly with glass cleaner and microfiber cloth.

Post-Scan Processing for Better OCR

After scanning, quick processing steps can improve OCR accuracy significantly.

Image Enhancement

Rotate to Correct Orientation: Ensure text is horizontal. OCR systems expect standard text orientation—rotated scans reduce accuracy.

Crop to Document Edges: Remove unnecessary background. This helps OCR focus on the document content rather than processing edge artifacts.

Adjust Contrast and Brightness: For faded handwriting, carefully increase contrast to make ink stand out from paper. Scanner apps usually include these adjustments.

Deskew: If the scan isn't perfectly straight, use deskew tools (available in most scanner apps and image editors) to align text horizontally.

File Format Considerations

For OCR Processing: JPEG and PNG work well. Use PNG for black-and-white documents or if you need lossless compression. JPEG is fine for color scans if you avoid excessive compression (use quality 90+).

For Archiving: PDF preserves multi-page documents in single files. Modern PDFs can embed high-resolution images while remaining reasonably sized.

Color vs Grayscale vs Black/White:

  • Color: Use for documents with colored ink or highlighting you want to preserve
  • Grayscale: Ideal for pencil or faded ink—preserves subtle shades
  • Black and white (1-bit): Smallest files, works for high-contrast ink on white paper, but loses subtle detail

From Scans to Text: OCR Processing

Once you have quality scans, OCR processing extracts the actual text.

Built-in OCR Options

Apple Live Text: Works directly from Photos app on scanned images. Tap the Live Text icon, select text, and copy. Quick but limited accuracy on cursive or challenging handwriting.

Google Lens: Similar to Live Text for Android. Point at scanned images, get instant text extraction. Best for clear handwriting.

Limitations: Built-in OCR handles basic handwriting but fails on cursive, mixed styles, faded ink, or historical scripts.

Specialist Handwriting OCR Platforms

For serious handwriting conversion, specialist OCR platforms trained specifically on handwriting deliver dramatically better accuracy:

HandwritingOCR: Uses advanced AI models (Google Gemini, Azure Document AI, OpenAI) specifically trained on millions of handwriting samples. Handles cursive, mixed styles, faded ink, and challenging scripts that defeat built-in phone OCR.

Workflow: Upload your scanned images (from phone, tablet, or scanner), process with modern AI, download as editable Word documents, Excel spreadsheets, or structured data formats.

When to Use Specialist OCR:

  • Cursive or mixed handwriting styles
  • Historical letters or documents with faded ink
  • Batch processing multiple documents
  • Extracting structured data (like handwritten tables to Excel)
  • When accuracy matters and you don't want to spend hours fixing errors

Built-in phone OCR works for casual quick notes. For serious document digitization, handwriting to text platforms deliver professional results.

Platform-Specific Scanning Guides

Each device ecosystem has specific features and workflows:

iOS/iPad Scanning Ecosystem

Apple's integration between Camera, Photos, Notes, and Files apps creates seamless scanning workflows. Live Text works system-wide, so any image with text (including scanned handwriting) becomes selectable.

Shortcuts Integration: Create iOS Shortcuts that automate scanning → OCR → export workflows, chaining together scanning, cloud upload, and text extraction steps.

For complete iOS scanning instructions optimized for handwriting, see scan handwritten notes on iPhone.

Android Scanning Ecosystem

Google's ecosystem revolves around Google Lens, Google Photos, and Google Drive integration. Scan with Drive, store in Photos, process with Lens.

Google Keep Integration: Scan handwritten notes directly into Keep notes, which includes basic OCR extraction for note text.

Full Android scanning workflows are detailed in Android handwriting scanner guide.

Scanner Hardware Integration

Dedicated scanners typically include software with batch scanning, OCR, and export features. Most create PDFs with embedded text layers (for printed text) but handwriting recognition requires uploading to specialist platforms.

For scanner recommendations and optimal settings, see document scanner for handwritten notes guide.

Common Scanning Problems and Solutions

Understanding typical issues helps you troubleshoot poor OCR results.

Blurry or Out-of-Focus Scans

Cause: Camera shake, wrong focus distance, or low light forcing slow shutter speed.

Solution: Stabilize your phone, ensure autofocus locks on the document, add more light, or use a flatbed scanner for guaranteed sharpness.

Shadows and Glare

Cause: Positioning light source or phone incorrectly, or scanning glossy paper.

Solution: Adjust lighting angle (45° from sides rather than directly overhead), use diffused light instead of point sources, tilt glossy documents slightly to avoid reflection.

Low Contrast (Faded Ink)

Cause: Pencil marks, aged ink, or light pen on white paper.

Solution: Increase scanner contrast settings, use grayscale instead of black/white, or scan at higher DPI to capture subtle variations. Post-scan contrast adjustment in image editor can help.

Skewed or Distorted Text

Cause: Document not flat, phone not parallel to paper, or page curl.

Solution: Flatten documents completely, hold phone parallel (not angled), or use flatbed scanner. Most scanner apps include deskew tools to fix minor alignment issues.

Incomplete Capture (Text Cut Off)

Cause: Framing document incorrectly, zooming too much, or using scanner glass smaller than document.

Solution: Ensure entire page is in frame with small margins. For oversized documents, scan in sections and digitally stitch, or use larger format scanner.

Batch Scanning Workflows

When digitizing collections—journals, letters, research notes—efficient workflows prevent the project from taking weeks.

Planning Your Scanning Project

Inventory Documents: Count pages to estimate time and storage requirements (600 DPI scans are 5-10MB per page typically).

Organize Physically: Sort documents into logical groups before scanning. This makes digital organization easier later.

Set Consistent Settings: Choose DPI, color mode, and format once, then use identical settings for the entire project. Consistency simplifies later processing.

Efficient Scanning Techniques

Assembly Line Approach: Scan all documents first, then batch-process OCR, then review results. Switching between tasks wastes time—complete each step for all documents before moving to next step.

Naming Conventions: Use systematic filenames (e.g., "Letter_1925_03_15_01.jpg" for a March 15, 1925 letter, first page). This makes finding and organizing scans infinitely easier.

Quality Checks: Scan a few representative pages, run OCR, check results. If accuracy is poor, adjust scan settings before continuing—don't discover problems after scanning 500 pages.

Cloud Storage and Workflow

Automatic Upload: Most scanner apps sync to Google Drive, iCloud, or Dropbox automatically. This creates backups and makes files accessible from your computer for OCR processing.

Desktop Processing: For batch OCR, uploading scans from your computer to HandwritingOCR is faster than processing each scan individually on your phone.

Choosing the Right Scanning Method

No single scanning approach fits all scenarios. Match your method to your needs:

Choose Phone Scanning If:

  • You need to capture a few pages quickly
  • You're scanning on-the-go (at library, archive, or field location)
  • Documents are standard letter-size with clear handwriting
  • You value convenience over maximum quality

Choose Tablet Scanning If:

  • Similar to phone scanning, but you value the larger screen for positioning
  • You're integrating with tablet productivity workflows

Choose Dedicated Scanner If:

  • You're digitizing large document collections (100+ pages)
  • Handwriting is challenging (cursive, faded, small, historical)
  • You need maximum quality and consistency
  • Documents are delicate and can't handle through-phone-photography handling

Best Practice: Use phone scanning for everyday notes and quick captures, but invest in flatbed scanner (or scanning service) for precious family letters, important historical documents, or large digitization projects where quality and consistency matter.

Converting Scans to Editable Text

After creating quality scans, the final step is extracting editable, searchable text.

Built-in Options Revisited

Apple Live Text and Google Lens provide instant results for simple handwriting. They're perfect for capturing a phone number from a sticky note, copying an address from a business card, or grabbing a single sentence.

For anything more complex—complete letters, journals, cursive, historical documents—specialist OCR delivers professional results.

Professional Handwriting OCR

HandwritingOCR processes scans from any source (phone, tablet, or dedicated scanner) with AI specifically trained for handwriting recognition:

  • Upload scans in any common format (JPEG, PNG, PDF)
  • Process with modern AI (Google Gemini, Azure, OpenAI) optimized for handwriting, including cursive
  • Download results as Word documents (for editing), Excel spreadsheets (for structured data), or CSV/JSON (for database integration)
  • Privacy-focused: Your scanned documents aren't used to train AI models

The workflow is straightforward: scan → upload → download text. Focus your effort on quality scanning (this guide), and let specialist OCR handle the text extraction.

Conclusion

Scanning handwriting to text starts with capturing clear, well-lit, high-resolution images of your handwritten documents. Phone cameras offer remarkable convenience for everyday scanning, while dedicated document scanners deliver the quality serious digitization projects demand. Proper lighting, resolution settings, and document preparation dramatically impact whether OCR accurately recognizes your handwriting—or requires hours of manual correction.

Built-in tools like Apple Live Text and Google Lens work well for simple, clear handwriting in casual use. For cursive, faded historical documents, or any serious document conversion project, specialist handwriting OCR platforms trained on millions of handwriting samples deliver the accuracy that makes digitization worthwhile rather than frustrating.

Ready to convert your scanned handwriting to editable text? Try HandwritingOCR with free credits and see how modern AI-powered handwriting recognition handles even challenging cursive and historical scripts that defeat built-in phone OCR.

Frequently Asked Questions

Have a different question and can’t find the answer you’re looking for? Reach out to our support team by sending us an email and we’ll get back to you as soon as we can.

What is the ideal DPI setting for scanning handwriting for OCR?

For handwritten documents, a resolution of 300 DPI (dots per inch) is the optimal balance between file size and recognition accuracy. 600 DPI is recommended for very small handwriting or historical documents with fine detail.

How does lighting affect the quality of a handwritten scan?

Even, bright lighting is critical to avoid shadows and glare. Shadows can be misread as characters by OCR, while glare can 'wash out' ink details. Natural light or multiple light sources to reduce shadows yield the most accurate results.

Should I scan my handwriting in color, grayscale, or black and white?

Grayscale or high-quality color scans usually provide the best results for OCR. Black and white (binary) scanning often loses subtle ink transitions and can make handwriting look 'jagged', which reduces AI recognition accuracy.